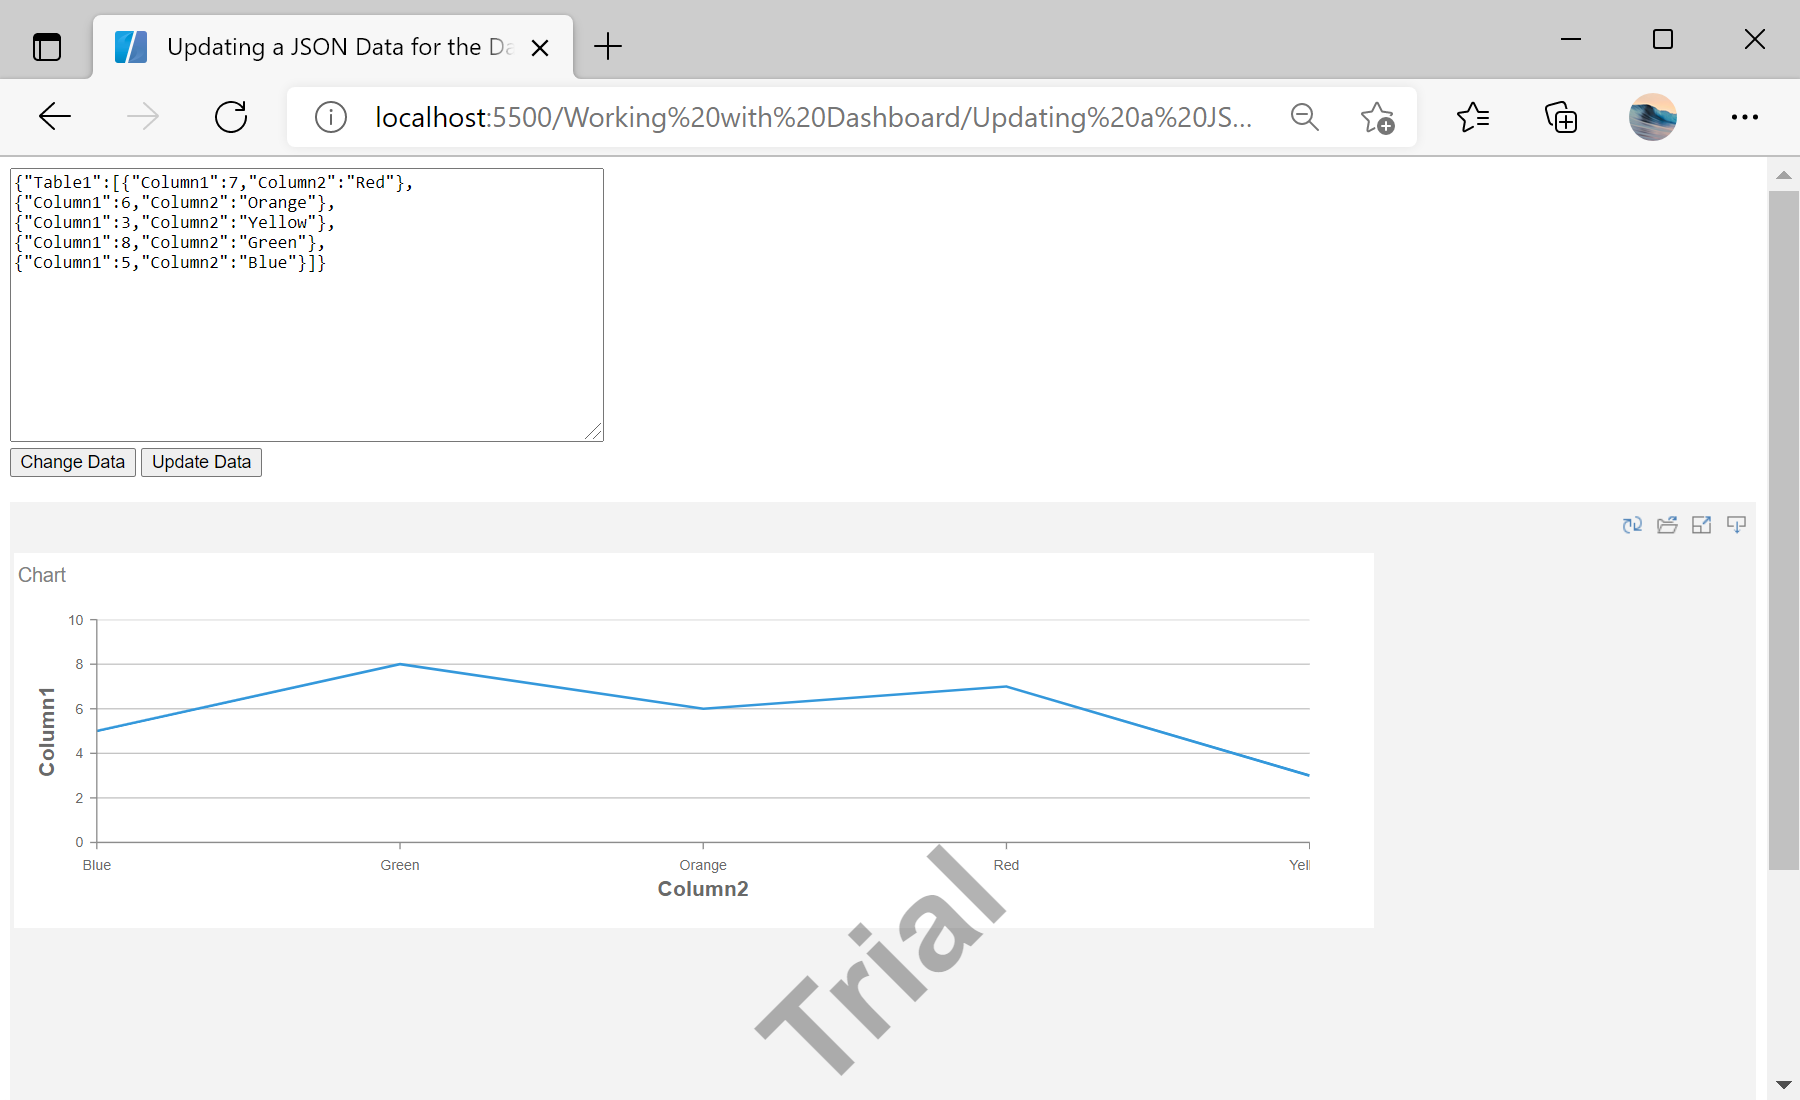
This example demonstrates how to update JSON data for dashboard viewer. First, create text area and two buttons:
...

	<textarea name="jsonString" id="jsonString" style="width: 440px; height: 200px;"></textarea>

	<input type="submit" value="Change Data" onclick="changeData()" />
	<input type="submit" value="Update Data" onclick="setData()" />

...
Then, parse JSON from text area:
<script type="text/javascript">
	function setData() {
		// Parse JSON from textarea
		var jsonData = JSON.parse(jsonString.value);

...
Next, create new dataset object and register it:
...

		// Create new DataSet object
		var dataSet = new Stimulsoft.System.Data.DataSet("Demo");
		dataSet.readJson(jsonData);

		// Register DataSet object
		report.regData("Demo", "Demo", dataSet);

		Stimulsoft.Report.Dashboard.StiCacheCleaner.clean();

...
After that, attach dashboard in the viewer:
...

		// Show dashboard in the Viewer
		viewer.report = report;
	}

...
Now, create a function to change data:
...

	function changeData() {
		var jsonData = {
			"Table1": [{
				"Column1": getRandom(),
				"Column2": "Red"
			}, {
				"Column1": getRandom(),
				"Column2": "Orange"
			}, {
				"Column1": getRandom(),
				"Column2": "Yellow"
			}, {
				"Column1": getRandom(),
				"Column2": "Green"
			}, {
				"Column1": getRandom(),
				"Column2": "Blue"
			}]
		};

		jsonString.value = JSON.stringify(jsonData);

		setData();
	}

	function getRandom() {
		return Math.round(Math.random() * 10);
	}
</script>
Finally, create the dashboard viewer and load dashboard. Call
changeData() function to change JSON data:
<script type="text/javascript">
	// Set full screen mode for the viewer
	var options = new Stimulsoft.Viewer.StiViewerOptions();
	options.appearance.scrollbarsMode = true;
	options.appearance.fullScreenMode = false;

	// Create the dashboard viewer with specified options
	var viewer = new Stimulsoft.Viewer.StiViewer(options, "StiViewer", false);
	var report = Stimulsoft.Report.StiReport.createNewDashboard();

	// Load dashboard from url
	report.loadFile("../dashboard/DashboardUpdateJson.mrt");

	// Show the report viewer in this place
	viewer.renderHtml();

	changeData();

</script>
Also, you can use the buttons, created before, to change or update data.
In the screenshot below you can see the result of the sample code:
