We continue our series of articles on the features of connecting various data sources using Stimulsoft products. In the previous article, we discussed connecting MySQL data. In this one, we will focus on OData sources.
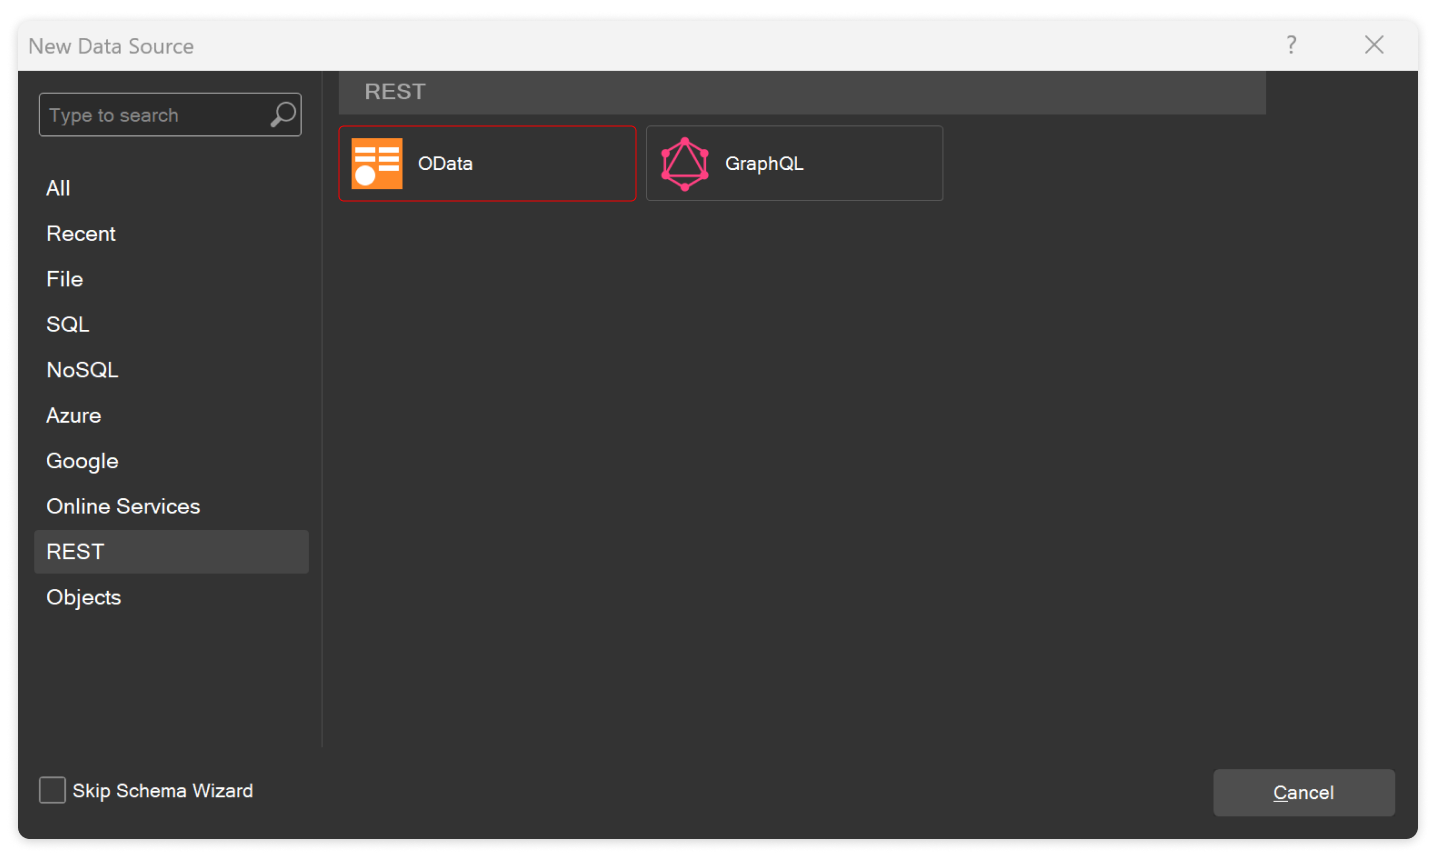
The window that appears lists all available data sources. The OData option you are looking for is located under the REST tab.
 Remember!
After selecting a data source type, the Designer checks for the presence of the required adapter at C:\Users\%username%\AppData\Local\Stimulsoft\DataAdapters\. If the adapter is not detected, click the Download button to download and install it.

As we did with the MySQL source, let’s look at an example of data filtering. To do this, add a filter parameter to the data request expression. For example: Products?$filter=ProductID le 10. Then, click the OK button in the data source editor window.
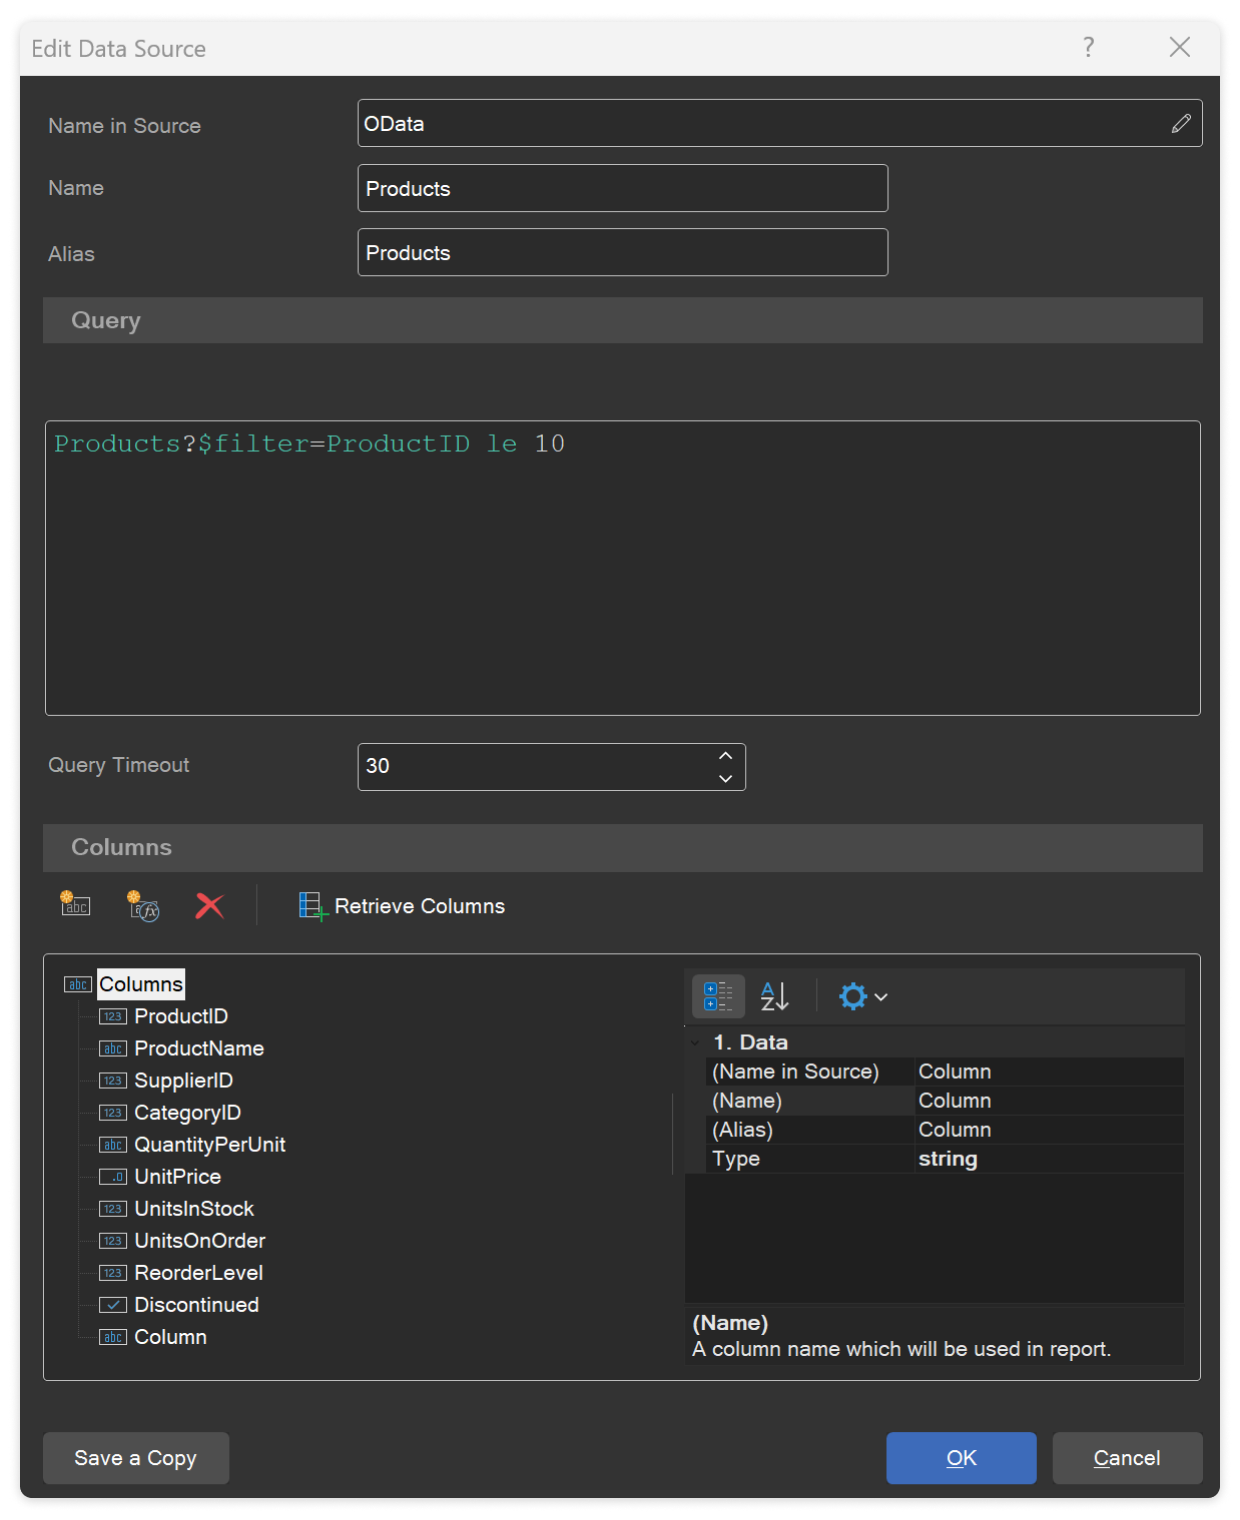
Now, when rendering a report using the current data source, only filtered data will be used.
Creating a connection
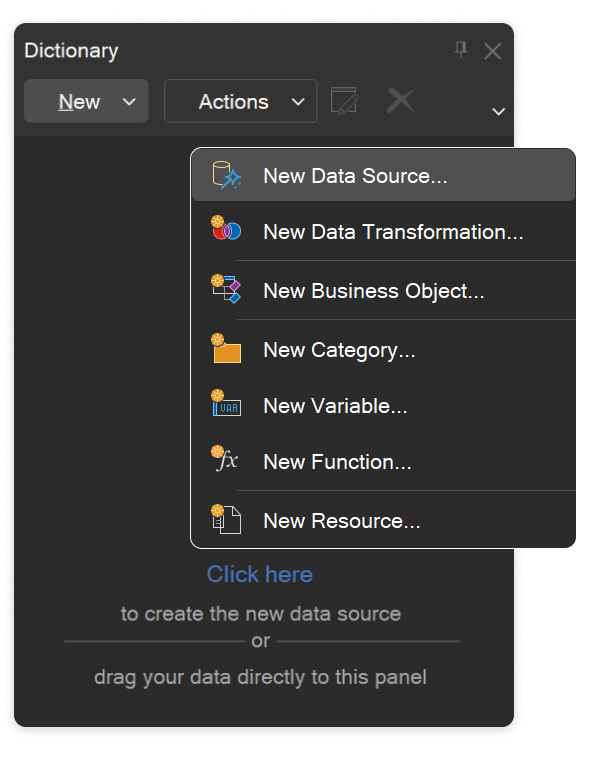
To connect data sources, go to the Dictionary tab, click the New button, and select the New Data Source option. The window that appears lists all available data sources. The OData option you are looking for is located under the REST tab.
Remember!After selecting a data source type, the Designer checks for the presence of the required adapter at C:\Users\%username%\AppData\Local\Stimulsoft\DataAdapters\. If the adapter is not detected, click the Download button to download and install it.
Connection Settings
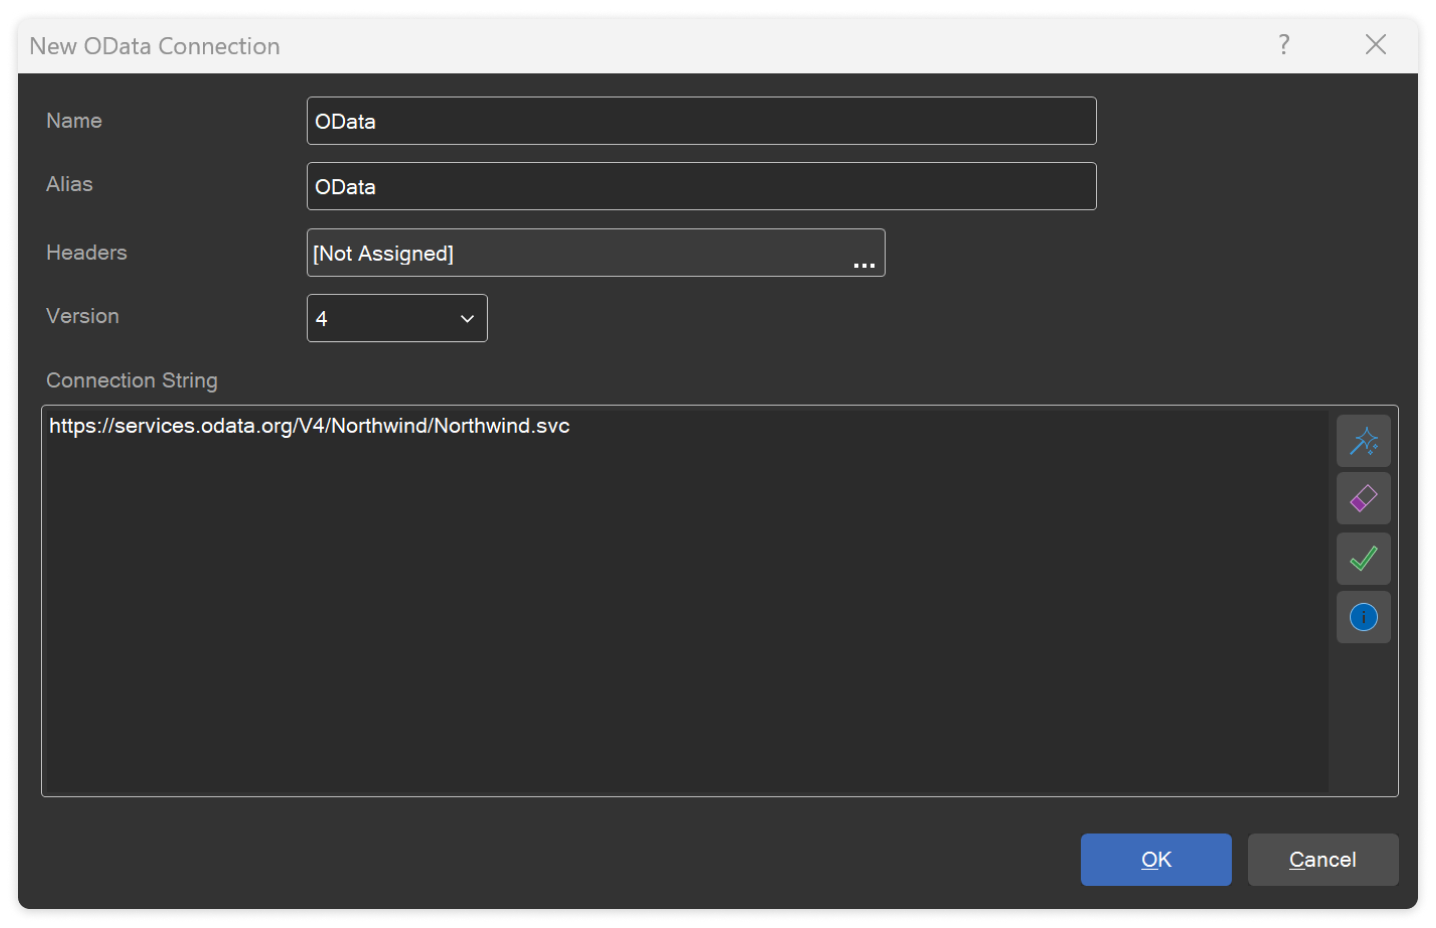
Next, you should define connection settings: version, name, alias, and the connection string. In addition, OData source can use HTTP request headers; we discussed this in detail there. After entering the connection string, click the Test Connection button. Once the connection is successful, click the OK button in the OData source connection editor.
Data selection
The next step is to select data tables, which will be used in a report or dashboard. To do this, you need to mark the necessary elements in the list.
Editing requests
You can also edit the OData source. To do this, select the required source in the dictionary and select the Edit command.As we did with the MySQL source, let’s look at an example of data filtering. To do this, add a filter parameter to the data request expression. For example: Products?$filter=ProductID le 10. Then, click the OK button in the data source editor window.
Now, when rendering a report using the current data source, only filtered data will be used.
If you have any questions about connecting to an OData source using Stimulsoft products, please contact us.