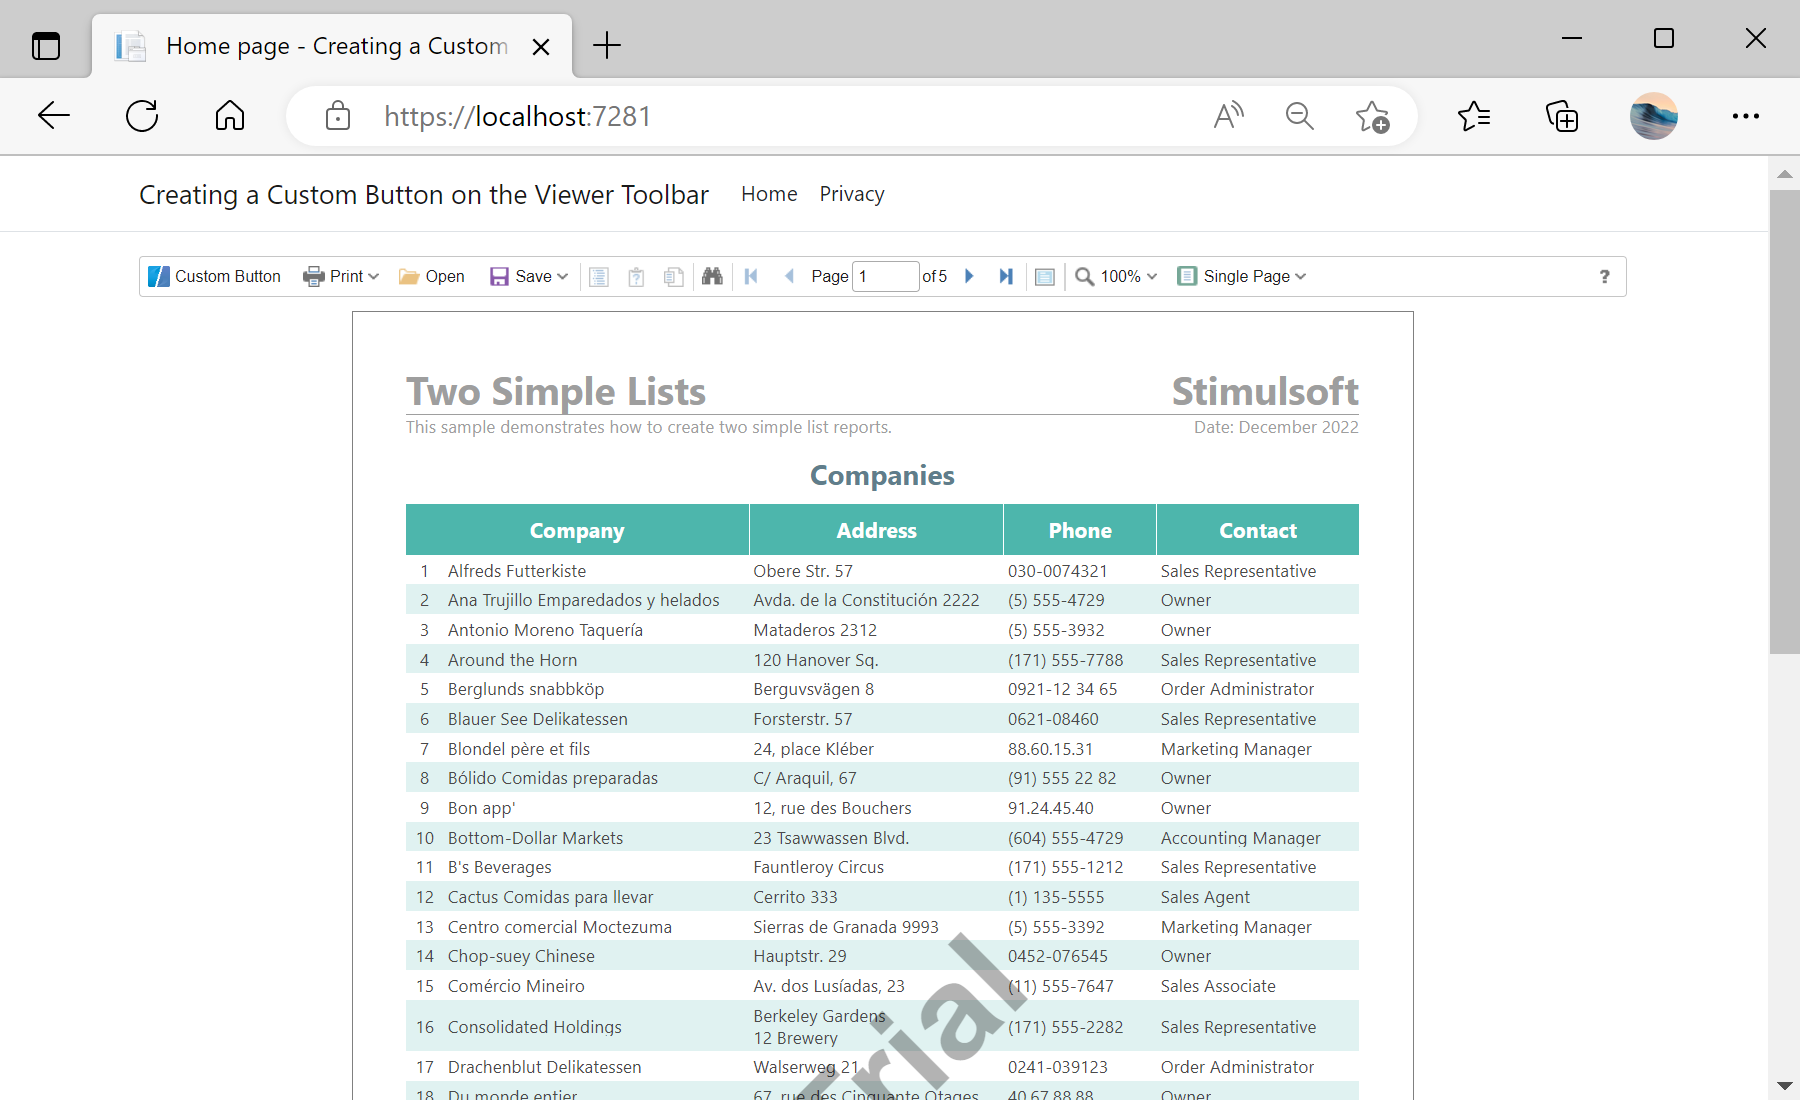
This example shows how to add custom button on the toolbar in the viewer.
First, you need to add the
StiNetCoreViewer component to the view page. Also you need to pass the
StiNetCoreViewerOptions object to the constructor. In the options you should set are
GetReport and
ViewerEvent. They are located in the Actions options group:
@using Stimulsoft.Report.Mvc;

...

@Html.StiNetCoreViewer("StiNetCoreViewer1", new StiNetCoreViewerOptions()
{
    Actions =
    {
        GetReport = "GetReport",
        ViewerEvent = "ViewerEvent"
    }
})
Next, add custom button with event:
<script type="text/javascript">
	jsStiNetCoreViewer1.onready = function () {
		var customButton = jsStiNetCoreViewer1.SmallButton("customButton", "Custom Button", "emptyImage");
		customButton.image.src = "icon.png";
		customButton.action = function () {
			alert("Custom Button Event");
		}

		var toolbarTable = jsStiNetCoreViewer1.controls.toolbar.firstChild.firstChild;
		var buttonsTable = toolbarTable.rows[0].firstChild.firstChild;
		var customButtonCell = buttonsTable.rows[0].insertCell(0);
		customButtonCell.appendChild(customButton);
	}
</script>
The
OnPostGetReport action loads the report and returns the answer to the client part of the viewer using the
GetReportResult() static method. In the parameters of this method, the report object should be passed. For example, load the rendered report file:
public IActionResult OnPostGetReport(string id)
{
	// Create the report object
	var report = new StiReport();

	// Load report template
	report.Load(StiNetCoreHelper.MapPath(this, "Reports/TwoSimpleLists.mrt"));

	return StiNetCoreViewer.GetReportResult(this, report);
}
The
ViewerEvent action handles all the viewer events (switching pages, zooming, printing, exporting, interactivity, etc.) and returns the answer to the client using the
ViewerEventResult() static method:
public IActionResult OnGetViewerEvent()
{
	return StiNetCoreViewer.ViewerEventResult(this);
}

public IActionResult OnPostViewerEvent()
{
	return StiNetCoreViewer.ViewerEventResult(this);
}
На скриншоте ниже Вы можете увидеть результат выполнения данного кода:
