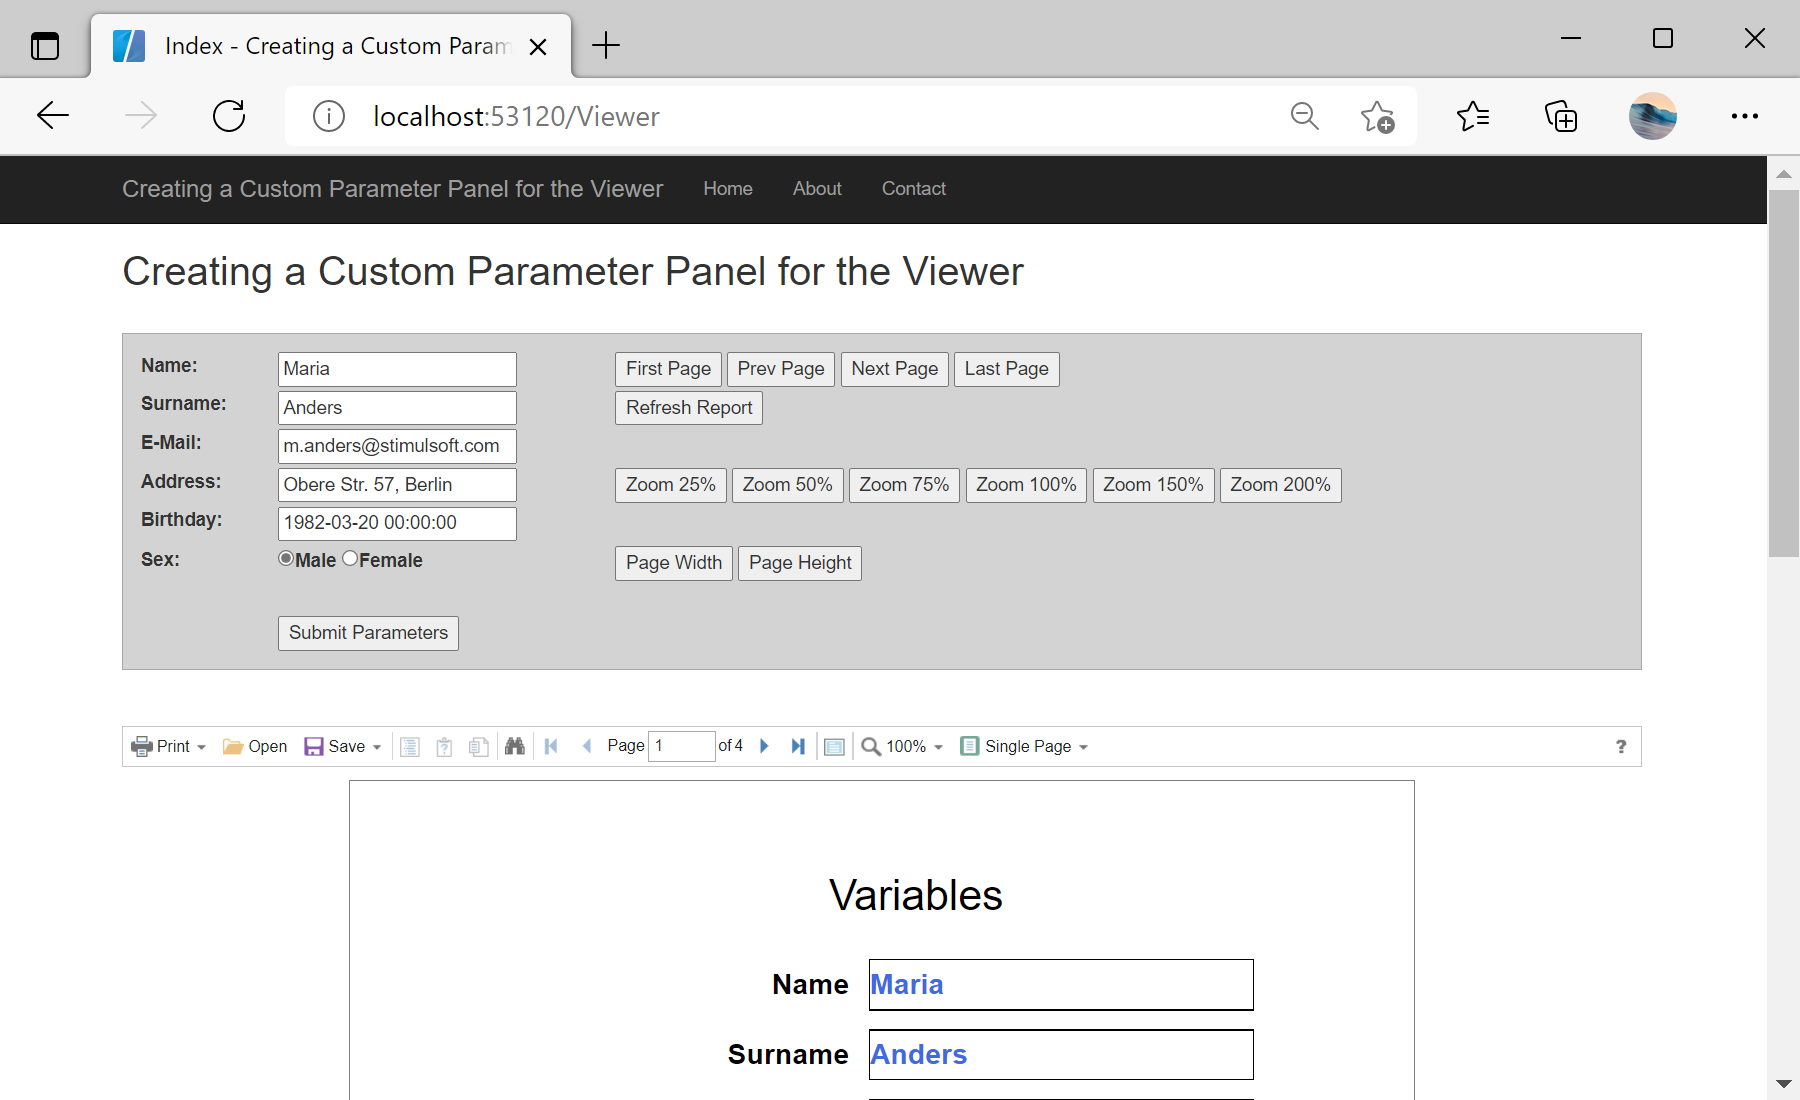
This sample project demonstrates how you can create a custom parameter panel for the viewer. First, create a collection of report variable values:
<script>
	function viewerSubmitParameters() {
		// Creating a collection of report variable values
		var params = {
			action: "Variables",
			variables: {
				"Name": document.getElementById("name").value,
				"Surname": document.getElementById("surname").value,
				"Email": document.getElementById("email").value,
				"Address": document.getElementById("address").value,
				"BirthDay": document.getElementById("birthday").value,
				"Sex": document.getElementById("male").checked
			}
		};

		// Updating the report with new values
		//
		// Important!
		// You need to have any interactive component or requested from user variable in the report, otherwise this function will not work
		//
		jsStiWebViewer1.postInteraction(params);
	}
</script>
Then, create HTML-template with buttons and inputs you need:
<div style="background-color: lightgray; border: 1px solid darkgray; padding: 10px; font-family: Arial;">
	<table>
		<tr>
			<td width="100"><label for="name">Name:</label></td>
			<td width="250"><input id="name" type="text" name="name" value="Maria" /></td>
			<td>
				<!-- Managing the current report page -->
				<button onclick="jsStiWebViewer1.postAction('FirstPage')">First Page</button>
				<button onclick="jsStiWebViewer1.postAction('PrevPage')">Prev Page</button>
				<button onclick="jsStiWebViewer1.postAction('NextPage')">Next Page</button>
				<button onclick="jsStiWebViewer1.postAction('LastPage')">Last Page</button>
			</td>
		</tr>
		<tr>
			<td><label for="surname">Surname:</label></td>
			<td><input id="surname" type="text" name="surname" value="Anders" /></td>
			<td>
				<!-- Updating a report with data -->
				<button onclick="jsStiWebViewer1.postAction('Refresh')">Refresh Report</button>
			</td>
		</tr>
		<tr>
			<td><label for="email">E-Mail:</label></td>
			<td><input id="email" type="text" name="email" value="m.anders@stimulsoft.com" /></td>
			<td></td>
		</tr>
		<tr>
			<td><label for="address">Address:</label></td>
			<td><input id="address" type="text" name="address" value="Obere Str. 57, Berlin" /></td>
			<td>
				<!-- Managing the current page zoom -->
				<button onclick="jsStiWebViewer1.postAction('Zoom25');">Zoom 25%</button>
				<button onclick="jsStiWebViewer1.postAction('Zoom50');">Zoom 50%</button>
				<button onclick="jsStiWebViewer1.postAction('Zoom75');">Zoom 75%</button>
				<button onclick="jsStiWebViewer1.postAction('Zoom100');">Zoom 100%</button>
				<button onclick="jsStiWebViewer1.postAction('Zoom150');">Zoom 150%</button>
				<button onclick="jsStiWebViewer1.postAction('Zoom200');">Zoom 200%</button>
			</td>
		</tr>
		<tr>
			<td><label for="birthday">Birthday:</label></td>
			<td><input id="birthday" type="text" name="birthday" value="1982-03-20 00:00:00" /></td>
			<td></td>
		</tr>
		<tr>
			<td><label for="sex">Sex:</label></td>
			<td>
				<input id="male" type="radio" name="sex" value="true" checked="checked" /><label for="male">Male</label>
				<input id="female" type="radio" name="sex" value="false" /><label for="female">Female<//label>
			</td>
			<td>
				<!-- Managing the current page zoom -->
				<button onclick="jsStiWebViewer1.postAction('ZoomPageWidth');">Page Width</button>
				<button onclick="jsStiWebViewer1.postAction('ZoomOnePage');">Page Height</button>
			</td>
		</tr>
		<tr>
			<td> </td>
			<td></td>
			<td></td>
		</tr>
		<tr>
			<td></td>
			<!-- Submitting the specified report parameters -->
			<td><button onclick="viewerSubmitParameters()">Submit Parameters</button></td>
			<td></td>
		</tr>
	</table>
</div>
Finally, display the viewer:
<div>
    @Html.Stimulsoft().StiMvcViewer("StiMvcViewer1", new StiMvcViewerOptions()
    {
        Actions =
        {
            GetReport = "GetReport",
            ViewerEvent = "ViewerEvent"
        }
    })
</div>
На скриншоте ниже Вы можете увидеть результат выполнения данного кода:


